
How to Advertise Your Business on Facebook
Are you using social media to promote a small business? If you are wondering how to advertise your business on Facebook, creating a Facebook page for your business is a great place to start.
After all, Facebook is the biggest social media platform in the world. The platform currently has about 2.89 billion active users every month and brings in an additional source of audiences from owning four of the other biggest platforms (WhatsApp, Messenger, and Instagram).
You’ve probably heard of this by now, but if you want to establish a stronger online presence, you need to blow up your business on Facebook.
You can create Facebook pages, run Facebook ads, and access Facebook groups. These are tools a local business can use to enhance their social media marketing strategy—but does Facebook advertising really work? What can you get out of it?
This article goes into the specific benefits of advertising your business on Facebook so that you can implement the right strategies for success!
Engage and retain customers with custom text and email campaigns
The Facebook Advantage for Businesses
Exposure is everything in today’s interconnected world; if you can’t reach your audience, your competitors will. To ensure you stay on top of your game, you must use the best tools available to you, such as Facebook business pages.
Facebook offers various significant advantages for big brands and small businesses alike.

A Large and Diverse Audience
Based solely on numbers, Facebook has the broadest reach out of all the other social media sites. According to Statista, Facebook has 226 million users in the US alone. You can talk to anyone on the street, and most of them will have a Facebook account.
Another report states that the most significant demographic on the platform consists of millennials aged 25 to 34, with young adults aged 18 to 24 following closely behind. These are all working-age demographics with high potential buying power, which you can take advantage of regardless of your business’s industry.
If your target audience is on Facebook, it’s high time you were, too.
Free Advertising
One of the best benefits this social media platform offers is the ability to advertise your business without paying anything.
While Facebook has effective paid advertising and audience targeting functionality, that doesn’t mean you need to shell out money to promote your business. Instead, you can organically improve your exposure with the right strategies, such as:
- Creating interesting content
- Encouraging engagement through prompts
- Offering partnerships with influencers or Facebook personalities
Increased Visibility
Brand visibility is incredibly efficient on Facebook.
Not only does it have a massive audience reach, but it also has a complete set of tools for audience targeting, post scheduling, optimization, and engagement.
A Facebook business page gives you the optimal ecosystem to establish and grow your online presence.
Facebook Tips for Business Owners
Advertising on Facebook is great, but how can you take advantage of these fantastic tools yourself? Here are a few tips to consider.
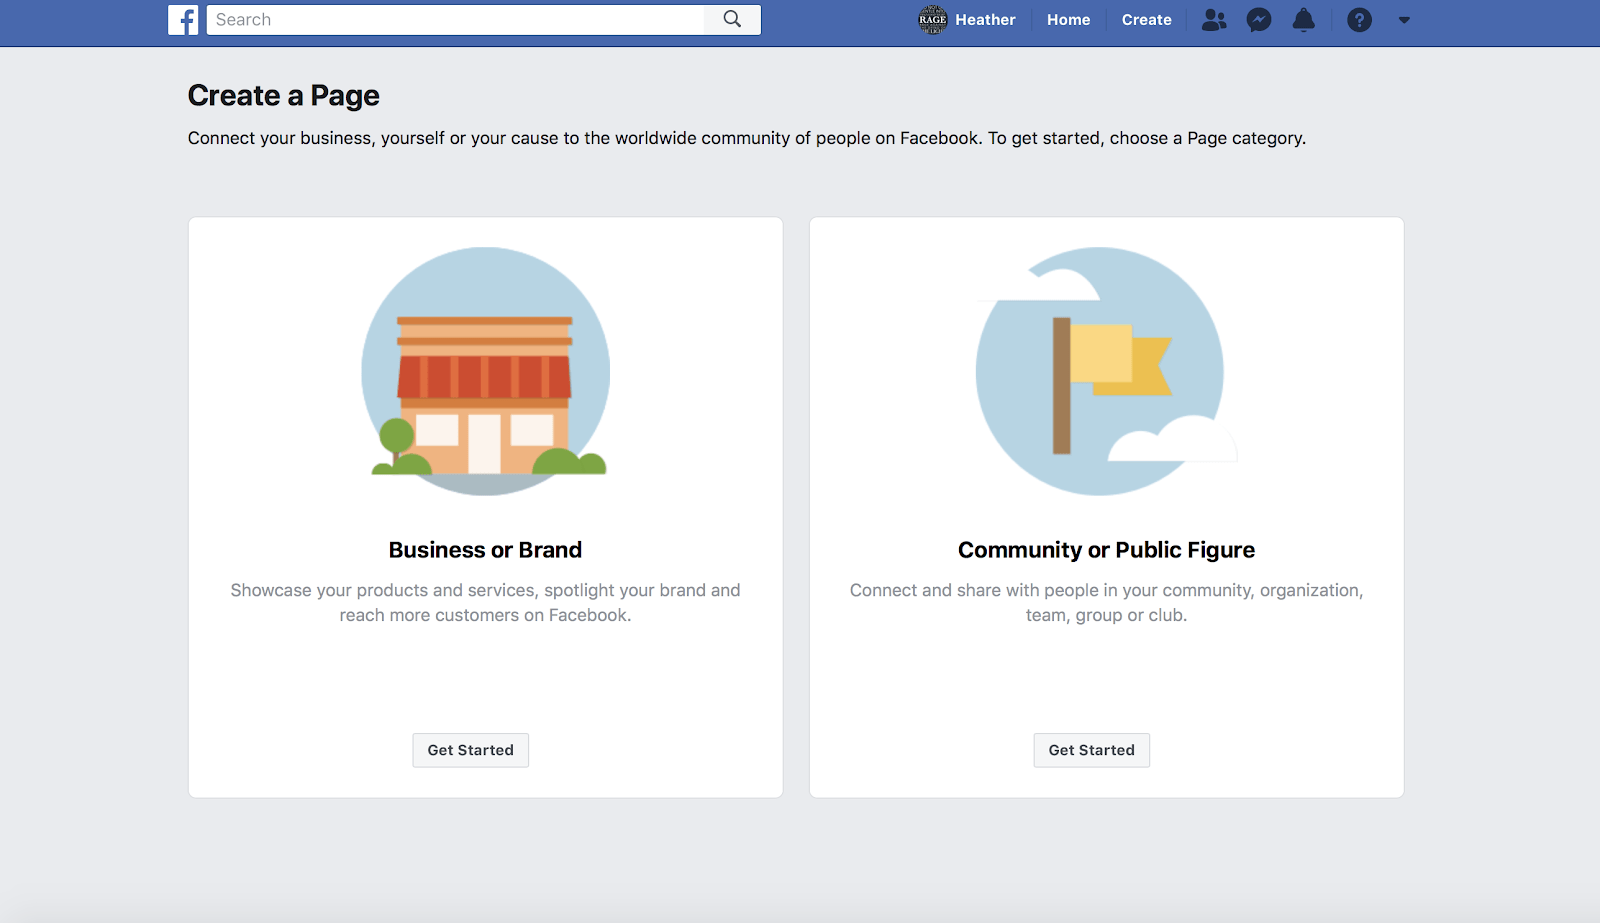
Creating a Page
Your personal Facebook account shouldn’t be your sole account for your business. And it’s not just because you might want to create a separation between your personal and business lives—but also because a Facebook business page offers more tools and services than a personal profile has.
A Facebook business page creates a seamless process for advertising and engagement. This allows your time spent marketing on Facebook to be more efficient than if you just used a personal account.
Plus, a business account is more professional and can serve as better social proof for your audience. Make sure your Facebook business page has a professional cover photo, logo, and relevant information.
Posting Relevant and Engaging Content
The best way for your business to expand its exposure and reach its audience is to add value for your audience. People consume things that are worth their time, whether through entertainment, information, or everything else in between.
In other words, creating relevant and engaging content is an excellent strategy to reach your target audience. Here are several examples of how you can do this.
- Posting informational content. Create, repost, or feature informative things related to your industry on your Facebook business page to give your audience a better idea of what you do and show your expertise.
- Conducting surveys. Gauge what your audience wants through surveys that ask relevant questions about your audience’s experience.
- Create entertaining content. Give your audience content that they won’t regret consuming.
- Join Facebook groups. Join groups related to your business niche and interact with the members to gain connections and build rapport.
Interacting with Your Audience
Aside from the massive reach and comprehensive Facebook marketing tools, another thing that Facebook does well is let you directly interact with your target audience. The business system integrates seamlessly with the Facebook ecosystem so customers can message your page directly from their personal accounts. You can also ask for Facebook reviews.
You can always answer questions, respond to inquiries, receive feedback, and address your audience’s concerns about your products and services through comments on posts or direct messages.
Take full advantage of this opportunity by interacting with your audience on Facebook. Automate chat responses to save time answering basic questions, but always have a team member ready to respond to more involved chats. This way, your customers will always feel that you are taking care of their needs, improving their perception of your brand.

Advertising on Facebook
If you’re ready to go the paid route, consider using Facebook Ads. Creating Facebook ads is easy, and the price structure can fit any marketing budget.
You can even promote your business on other social media platforms, such as Instagram, because the Meta Business Suite has cross-platform functionality, allowing for more efficiency when making Facebook posts for your small business.
Whether boosting posts or creating banner ads, you have many options to maximize the benefits of Facebook’s tools.
Setting Up Your Business Account on Meta Business Manager
Step 1. Create a Facebook Account
Before diving into Meta Business Manager, ensure you have a personal Facebook account. If you don’t, head over to Facebook and sign up using your details.
Step 2. Sign Up for Meta Business Manager
Navigate to the Meta Business Suite and sign in with your Facebook profile. Click on Create Account and follow the prompts to set up your Business Account.
Adding People to Your Business Account
Before you start, ensure you have complete control of your Business Account and have activated two-factor authentication for added security.
- Head to the Business Settings section.
- Navigate to Users and click on People.
- Click the Add People option.
- Input the email address of the individual you wish to add and click Next.
- Specify the access level and click Next.
- Choose the asset you want to assign and the corresponding access type. For partial access, specify the task relevant to their role. Once done, click Invite.
- Review the invitation details and hit Send Request. Your invitee will receive an email prompting them to join your Business Account.
Adding Pages to Your Business Account
- Navigate to the Business Settings section.
- Choose Pages from the Accounts tab.
- Click on the Add option.
- From the dropdown menu, select Add a Page.
- Enter the name or URL of your Facebook Page.
- Click Add Page. Your page will be visible on the next screen, where you can further manage and add team members.
Important Note: Individuals who previously had access to the page before its integration into a Business Account will retain their access and management privileges. The transition won’t disrupt existing permissions.
Adding Ad Accounts in Business Manager
- Start by heading to the Business Settings section.
- Click on the Accounts option in the left-side menu, then navigate to Ad Accounts.
- Locate and click the blue Add dropdown menu.
- Choose from three options: Add an ad account, Request access to an ad account, or Create a new ad account.
- If opting to request access or add an ad account, input the ad account ID. Not sure where to find it? Learn where to locate the account ID.
- Follow the prompts to designate team members and set access levels.
Note: Deactivating an ad account doesn’t remove it entirely from your business. Even when deactivated, the ad account still contributes to your overall ad account limit.
Requesting Access to a Page in Business Manager
Before you request access to a page, ensure you’ve added a primary page to your Meta Business Manager.
- Begin by navigating to Business Settings.
- Under Accounts, select Pages.
- Click the blue Add dropdown button.
- Opt for Request access to a Page.
- Enter the Facebook page name or URL.
- Toggle the switches to select the specific permissions you require.
- Click Request access.
Congrats! Your request is now on its way to the page admin. Once approved, you’ll seamlessly see the page incorporated into your Business Account.
Adding an Instagram Account in Business Manager
Before adding an Instagram account to your Meta Business Manager, ensure it is a professional account on Instagram and that you have the username and password at your fingertips. Additionally, ensure the Instagram professional account is not owned by another business, as only admins can initiate this process.
- Start by heading to Business Settings.
- Click on Accounts.
- Navigate to Instagram accounts.
- Click the blue Add button.
- Opt to Connect your Instagram account.
- Enter your Instagram username and password. For added security, a verification code may be sent to your associated email or phone.
- On the next screen, choose the ad accounts and pages you wish to assign. Click Finish.
Connecting Your Ad Account to the Instagram Account
- Go to Business Settings.
- Click on Accounts.
- Move to Instagram accounts.
- Select the Instagram account you added.
- Click on Connected Assets.
- Hit Add Assets.
- Choose an ad account.
- Click Add.
And there you go—you’ve integrated your Instagram account into your Business Manager. Now, your social media assets are ready to collaborate to create a synchronized advertising presence.
Setting Up Your First Ad Campaign on Facebook
Adding Facebook Pixel to a Website
Setting up a pixel for your website can seem like a daunting task, but fear not! We’ve broken down the process step-by-step to help you effortlessly create and customize your Meta Pixel.
Step 1: Creating Your Pixel and Adding the Base Code
Before you start, ensure you have a functioning website for your business. Confirm that you or your developer have the capability to update your website’s code if you plan to set up the pixel manually using code.
Now, let’s get started:
- Go to Meta Events Manager.
- Click Connect data sources and select Web.
- Click Connect.
- Enter a name for your pixel and click Create Pixel. This action generates a new ID, viewable in Events Manager.
Note: Events from your Meta Pixel are shared to a dataset, grouping events from different sources. Your new dataset ID is the same as your new pixel ID.
Depending on whether you have a website or not, proceed accordingly:
- If you have a website, enter your website URL to check for easy partner integration setup options, and click Check.
- If a partner integration is available, follow the onscreen instructions to set up your pixel and events through your partner’s website.
- If partner integration is not available, proceed to the next step.
- If you don’t have a website, check the box next to I don’t have a website and click Continue.
Step 2: Set Up the Meta Pixel and Events on Your Website
Continue with the setup based on your preferences:
- Select Get guidance if you want setup recommendations. Follow the onscreen instructions in Events Manager.
- Select Do it yourself if you already know how to connect your data. Continue with the following instructions. Select Conversions API and Meta Pixel or Meta Pixel only as your setup option.
If you choose the Conversions API and Meta Pixel:
- Select setup options: Set up with partner integration, Set up with Conversions API Gateway, or Set up manually.
- Follow onscreen instructions to set up the pixel, Conversions API, and events based on your chosen option.
- If you’re unsure, compare Conversions API setup options by cost and complexity.
- Complete the setup according to your chosen method.
If you choose Meta Pixel only:
- Choose how to set up your pixel code: Install code manually or Check for partner.
- If you have a developer assisting you, you can click Email instructions instead.
Setting Up an Ad Campaign, Ad Set, and Ad
Setting Up an Ad Campaign
Choosing Your Buying Type:
The buying type you select for your campaign dictates how you pay for, target, and measure your ads. This decision requires a thoughtful consideration of your campaign goals. You have two options: auction or reservation. Familiarize yourself with the differences between these buying types before proceeding to ensure the best results.
Creating a Campaign with Auction as Your Buying Type:
- Navigate to Ads Manager and select Create to initiate the process.
- Opt for Auction as your buying type.
- Choose a relevant ad objective that aligns with your campaign goals.
- Continue to open the creation pane.
- Provide a descriptive name for your campaign in the designated text box.
- Optionally, turn on the Special ad category and choose a category from the dropdown.
Note: If your campaign involves credit, employment, housing, social issues, elections, or politics, selecting the appropriate Special Ad Category is mandatory.
- Explore options for A/B testing and Advantage campaign budget.
- Set your daily or lifetime budget based on your preferences.
- Show more options to run ads on a schedule if desired. (Schedules available for lifetime budgets.)
Creating a Campaign with Reservation as Your Buying Type:
- Visit Ads Manager and select Create to commence the process.
- Opt for Reservation as your buying type.
- Choose an ad objective, with options like awareness and engagement for reservation campaigns.
- Continue to open the creation pane, proceeding directly to the ad set creation.
- If applicable, enable the Special ad category and choose a relevant category from the dropdown.
- Upon completion, select Close to save your campaign or Next to advance to ad set creation.
Setting Up an Ad Set
Consider your ad placement options carefully, as they greatly impact the objectives you choose at the campaign level. The chosen objective determines the potential appearance of your ads on platforms like Facebook, Instagram, and the Meta Audience Network.
Creating Your Ad Set:
These steps are tailored for campaigns using auction as the buying type. If you opt for reservation as your buying type, check out how to set up a reservation campaign.
- Create a Campaign
-
-
- Kickstart the process by creating a campaign using the steps we mentioned in the previous section.
- Provide a descriptive name in the ad set name text box.
-
- Objective and Conversion Location
-
-
- Depending on your campaign’s objective, select a conversion location.
- Optionally, turn on dynamic creative at this level. Keep in mind that, once activated, manual customization of ads per placement at the ad level won’t be possible.
- In the Conversion section, prioritize the desired result by clicking Edit. Note that not all objectives offer more than one option.
-
- Budget and Schedule
-
-
- If applicable, set your daily or lifetime budget and enter the amount.
- Skip this step if you’ve activated Meta Advantage campaign budget at the campaign level.
- Choose start and end dates, ensuring the start date isn’t in the past.
- Explore more options to schedule ads for different times of the day. Note that schedules are only available for lifetime budgets.
-
- Audience Definition
-
-
- Define your target audience using a custom audience or a lookalike audience.
- Alternatively, hover over Locations, Age, Gender, Detailed targeting, and Languages. Click Edit to create a new audience, and Save this audience to use it later.
-
- Ad Placements
-
-
- Choose your ad placements wisely.
- You can opt for Advantage+ placements to allow the system to display your ads where they are likely to perform best.
- Alternatively, select Manual placements to choose your ad placements manually.
-
- Save and Move On
-
-
- Click Close to save your ad set.
- Alternatively, click Next to proceed to ad creation.
-
Setting up an Ad
The choices made at the campaign and ad set levels play a big role in shaping the options available during the creation of your ad. These strategic decisions are key to enhancing the effectiveness of your campaign.
Get Started with Ad Creation:
-
- Navigate to Ads Manager and initiate the ad creation process after setting up your campaign and ad set.
- Enter a descriptive name for your ad in the designated text box.
- Choose a Facebook Page and Instagram account to represent your business, as all ads require an associated Facebook Page.
- Select an ad format from options like single image or video, carousel, or collection.
- Choose your media based on the selected ad format:
- For single image or video ad:
-
-
-
- Add Media to upload new media or select from previously uploaded images or videos.
- Create a video using templates for a dynamic approach.
-
-
- For carousel ad:
-
-
-
- Select Image to upload new media or choose from previously uploaded images or videos.
- Add an optional headline, description, and website URL for each card in the carousel.
-
-
- For collection ad:
-
-
- Create a catalog (required).
- Choose to display catalog products dynamically or manually select up to four products.
- Upload or select media from your account, Facebook Page, Instagram account, or Meta Media Library.
- Depending on your choices, additional options may be available, such as adding a call-to-action button or choosing a pixel.
- Preview your ad and when satisfied, select Publish.
- To assess how your ad will appear across different placements, review the placement thumbnails alongside the ad preview.
- Before your ads go live on Facebook or Instagram, Meta automatically reviews them against their Advertising Policies. You can monitor the status of your ad in the Delivery column of Ads Manager.
-
By following these steps, you’ll be on your way to creating visually compelling and strategically impactful ads that resonate with your audience.
Congratulations! You’ve set up your Business Account on Meta Business Manager and launched your first Facebook ad campaign. Keep experimenting and refining your strategy to maximize your online presence. Good luck!
Promoting Your Business with Broadly
Your small business’s Facebook page will be the new frontline for your marketing operations. The world is moving fast, and it’s heading towards the realms of social media marketing. It’s high time you take advantage of the many opportunities that Facebook advertising has for your business.
Juggling multiple social media apps, managing customer reviews, and driving your digital marketing efforts can be overwhelming for a small business owner. Broadly’s comprehensive platform is the best way to organize your time and manage campaigns. Gain new leads, broaden your audience, and improve your online reputation all in one place with Broadly’s tools.
Watch your online reputation transform with Broadly